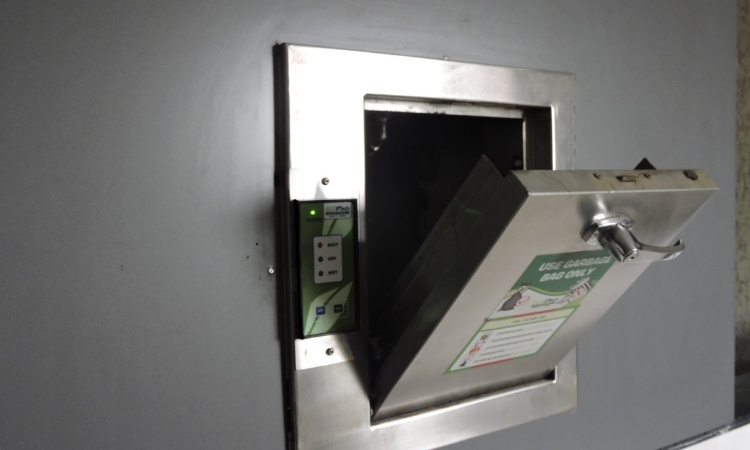
Install a rubbish chute and keep your home clean. A rubbish chute makes waste disposal easier and keeps the home clean. Many homes in Singapore use rubbish chutes to manage waste properly. The installation process may seem daunting, but with the right steps, it becomes simple.
A good installation ensures smooth operation and prevents bad smells or leaks. This guide explains a step-by-step process to install a rubbish chute at home properly.
How to Install a Rubbish Chute in Singapore?
Installing a rubbish chute in Singapore is simple if you know the process. Therefore, PS Home Maintenance Singapore provides a rubbish chute installation guide to help you with the process. Moreover, their demolition services, kitchen sink replacement, and different flooring installations stand out from those of their competitors in Singapore.
Step 1: Choose the Right Rubbish Chute
Select a chute that fits your needs. Stainless steel is generally considered ideal for its longevity and rust resistance. The size should be compatible with the available space. Select a chute with a tight-sealing door to stop pests and odours.
Some chutes have fire-resistant features for extra safety. Before buying, check if the chute complies with Singapore’s building regulations. The right model works well for years to come.

Step 2: Pick the Best Location
The chute should be easy to access but not in the way. People usually place it near the Kitchens and utility areas. Make sure the spot allows waste to fall straight down without blockages.
It is important to avoid placing it near windows to stop smells from spreading. A good location makes disposal easy and keeps the home hygienic.
Step 3: Prepare the Area
Measure the space where you want to install a new rubbish chute. Mark the points where cuts are needed. If replacing an old chute, remove it carefully to avoid damage to the wall. Clear the area of debris before installation.
If you are cutting a new opening, ensure it fits the chute properly. Wear safety gear while working to prevent injuries. A clean and well-prepared space makes installation easier.
Step 4: Install a Rubbish Chute Pipe
Place the chute pipe in position and check the alignment. The pipe must fit perfectly and allow smooth waste flow. Make sure that you place the chute with strong brackets to prevent movement.
If the chute has multiple sections, connect them tightly to stop leaks. Apply sealant at the joints for extra protection. A stable pipe ensures waste moves efficiently without clogging.
Step 5: Attach the Chute Door
Fix the chute door to the opening. Make sure it opens and closes properly. The door should be sealed tightly to prevent pests and bad smells. Secure the chute firmly so there is no leakage. Some doors have locks for extra safety. Adjust the door position to ensure it fits perfectly. A well-installed door keeps the chute clean and odor-free.
Step 6: Secure and Test the Installation
Check all connections to ensure everything is tight and stable. Drop small pieces of waste to test if they fall smoothly. Listen for unusual sounds that indicate blockages. Open and close the door several times to confirm it is properly connected. If any issues appear, fix them before completing the job. Testing ensures the chute works well from the start.

Step 7: Seal the Edges and Clean Up
Apply sealant around the chute edges to close small gaps. This prevents pests from entering and reduces air leaks. Let the sealant dry thoroughly before you use the chute. Clean the area and remove dust from installation. Wipe the chute with a damp cloth to remove fingerprints. A neat finish improves durability and hygiene.
Step 8: Maintain the Rubbish Chute
Regular cleaning keeps the chute in good shape. Use disinfectant to remove dirt and odours. Regularly check the chute for leaks and loose parts. Lubricate hinges if the door becomes hard to open.
Avoid throwing large and sharp objects inside to avoid damaging the chute. Proper maintenance helps the chute last longer and keeps the home fresh.
Conclusion
In Singapore, it is common practice to install a rubbish chute in homes. This makes waste disposal easier and keeps the living space clean. Following the above instructions ensures smooth operation of the chute for years. Regular checks and cleaning prevent problems. A well-installed rubbish chute improves home hygiene and convenience.
