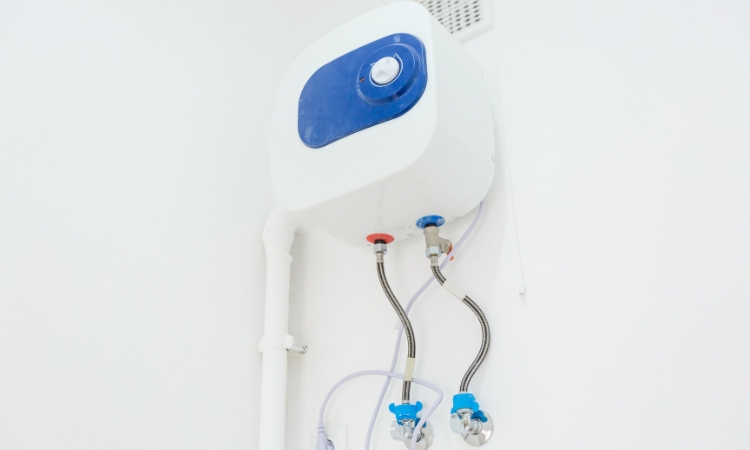
Homeowners need proper knowledge and tools to install a water heater using a DIY approach. Installing a water heater in your bathroom is a task that can significantly enhance your daily comfort, especially in Singapore’s humid climate. With a reliable hot water supply, showers become a relaxing experience, and household chores are easier. This guide will help you go through the steps of installing a water heater in your bathroom.
How to Install a Water Heater?
Installing a water heater in bathrooms is almost a necessity in modern homes. It provides warm water for showers, cleaning, and other uses. Whether upgrading an existing system or installing a new one, understanding the water heater installation process is crucial. This section will help you navigate the installation of a water heater in a typical Singaporean bathroom.
Step-by-Step Guide to Install a Water Heater in Your Home
Step 1: Gather Your Tools and Materials
Before you begin, ensure you have all the necessary tools and materials. You’ll need a water heater unit, a mounting bracket, screwdrivers, an adjustable wrench, a drill and drill bits, a measuring tape, plumber’s tape, pipe fittings, a water supply hose, electrical wire and conduit, a circuit breaker (if required), safety gloves, and goggles. Having these items on hand before starting will make the installation smoother and more efficient.
Step 2: Choose the Right Location
Select a suitable location for your water heater in the bathroom. Consider proximity to water outlets, as placing the heater near the shower or sink minimises heat loss. Ensure adequate ventilation to prevent overheating, and the unit is easily accessible for maintenance. Proper placement is crucial for your water heater’s efficient and safe operation.
Step 3: Turn Off Water and Electricity
Safety is paramount when installing a water heater. Turn off the main water supply to your bathroom to prevent accidental leaks. Additionally, the electricity at the circuit breaker must be switched off to avoid any electrical hazards during the installation process. This step ensures that you can work safely without the risk of water or electrical accidents.

Step 4: Install the Mounting Bracket
Most water heaters come with a mounting bracket. Use a measuring tape to mark the position on the wall where you will install the bracket, ensuring it is at a comfortable height. Drill holes into the marked positions on the wall and secure the mounting bracket using screws and a screwdriver. This step provides a stable base for your water heater, ensuring it is securely attached to the wall.
Step 5: Mount the Water Heater
When the bracket is securely in place, mount the water heater. Ensure it is firmly attached and stable. Proper mounting is essential to prevent the heater from falling or becoming loose, which could cause damage or injury.
Step 6: Connect the Water Supply
Next, connect the water heater to the water supply. A water supply hose connects the heater’s inlet valve to the main water supply pipe. Secure the fittings with the plumber’s tape to ensure a tight, leak-free connection. Slowly turn on the water supply and check for leaks, tightening connections if necessary. This step is crucial to ensure the heater’s water flow is secure and leak-free.
Step 7: Connect the Electrical Supply
Electrical connections should be handled with care. Connect the electrical wires from the heater to your home’s electrical system according to the manufacturer’s instructions. If required, install a dedicated circuit breaker for the water heater.
Use an electrical conduit to protect the wiring and secure it with clips. This step ensures the water heater is safely and properly connected to your electrical system, reducing the risk of electrical hazards.
Step 8: Test the Installation
Before using the water heater, it’s essential to test the installation. Switch on the electricity at the circuit breaker and adjust the temperature settings on the water heater to your preference. Turn on the hot water tap to ensure the heater is functioning correctly and providing hot water. Testing the installation helps verify everything is working properly before regular use.

Step 9: Final Safety Checks
Perform a final safety check by inspecting all connections for any signs of water leakage and ensuring all electrical connections are secure with no exposed wires. Make sure the heater is securely mounted and stable.
These final checks are essential to ensure your water heater’s long-term safety and reliability. Moreover, PS Home Maintenance Singapore is the best choice to enlist a water heater installation service in Singapore. They offer various services like flooring installation, appliance repair, electrician services, etc.
Conclusion
In conclusion, homeowners can install a water heater in their bathroom without waiting for a professional. Following this comprehensive guide, you can complete the installation safely and efficiently. Remember to prioritize safety at every step, use quality materials, and seek professional assistance. With your new water heater installed, you can enjoy warm showers and an improved daily routine.
