
In Singapore, it is a great way to install marble floor tiles to enhance the beauty of your space. These floors are beautiful and have a longer lifespan. Proper installation ensures durability and a smooth finish. Mistakes during the installation process make the surface imperfect.
In Singapore, high humidity requires extra care to stop moisture damage. Therefore, the installation process takes time but gives lasting elegance. This guide explains how to install marble floor tiles step by step.
How to Install Marble Floor Tiles?
Marble floor tiles installation Singapore is simple if you follow the instructions from PS Home Maintenance Singapore, who also offer professional flooring installation, ceiling repair, and waterproofing services in Singapore. Let’s explore their guide to fit marble floor tiles in the home.
Step 1: Choose the Right Marble Tiles
Pick quality marble tiles that match the space. Different types have different texture and durability. Polished marble usually has a glossy look. On teh other end, honed marble has a matte finish.
Check tile thickness to ensure better results. Measure the floor area to know the number of tiles needed. Buy extra tiles to cover installation mistakes. Thicker tiles generally last longer. Choose the tiles carefully to create a uniform look.
Step 2: Prepare the Surface
A clean and level surface allows proper adhesion. Remove dust and old flooring. Use a straightedge to check for uneven spots. A self-leveling compound fixes dips or bumps. Moisture weakens adhesive, so keep the floor dry before installation. Fix subfloor damage before moving forward. A strong base supports the weight of marble tiles and stops shifting over time.
Step 3: Plan the Layout
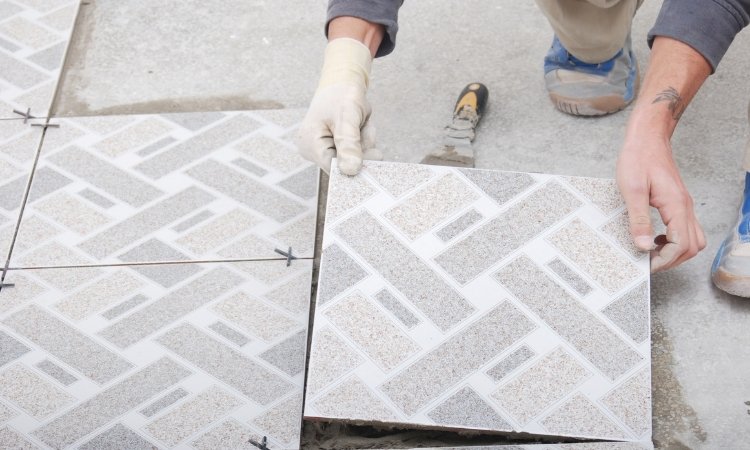
When you have decided the tiles, decide on the layout. Decide on the tile arrangement before setting them. Dry lay tiles to see how they fit. Adjust positions for the best pattern. Start from the center to balance cuts along walls. Mark guidelines on the floor to follow the work pattern.
Thoughtful planning is the key to stop misalignment and wasted tiles. A good layout gives a professional look. Place tiles in different patterns before deciding. Once you set them, changes become hard. Therefore, planning is crucial to install marble floor tiles in Singapore.
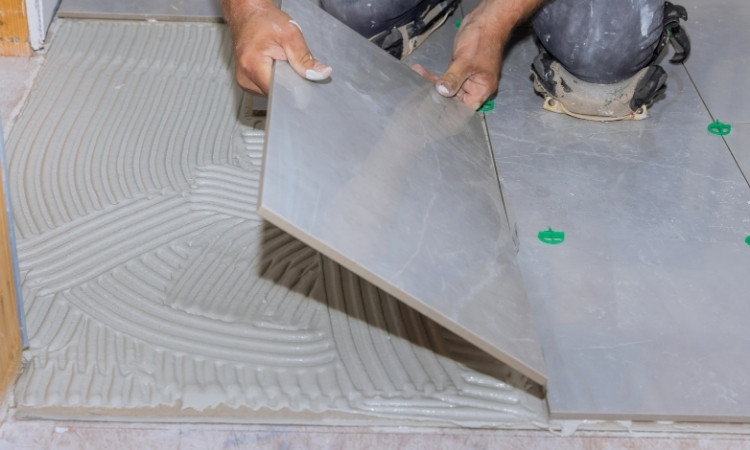
Step 4: Apply the Adhesive
Use a notched trowel to spread adhesive evenly across the surface. Apply in small sections to stop drying before setting tiles. Press each tile firmly into place. Spacers keep equal gaps for grout. Work carefully to stop adhesive from spreading onto the surface.
A strong bond ensures tiles stay fixed. Pick the right adhesive for marble flooring. Some adhesives stain the surface. Follow manufacturer instructions for the best results. Check tile positions before the adhesive dries. This step is essential in the longevity of the marble tiles flooring.
Step 5: Cut Tiles for Edges and Corners
The tiles you buy will not ideally fill into your place. Some areas will need cutting tiles to fit. A wet saw is a good tool for making the cuts. Measure carefully before cutting to avoid mistakes. Smooth rough edges to ensure a professional finish.
Proper cutting is essential for seamless alignment with walls and corners. Accurate cuts improve the overall look of the floor. A well-cut tile stops gaps. The right tools reduce waste and keep straight edges.
Step 6: Allow Tiles to Set
Tiles take time to stick to the surface properly. Therefore, avoid walking on the surface for at least 24 hours. Place barriers to stop accidental movement. Drying time depends on humidity and tile size. Do not rush through this step, as it weakens adhesion and causes loose tiles. When it is dry, check that all tiles remain in place.
Step 7: Apply Grout Between Tiles
Once tiles are set, fill gaps with grout. Use a rubber float to spread it evenly. Remove extra grout with a damp sponge before it hardens. Pick a grout color that matches the marble. Moreover, sealing grout stops stains and water damage.
Proper grouting adds strength and a clean finish. Ensure grout fills all gaps to stop moisture from reaching under tiles. Use a damp cloth to remove residue before it sets. Cleaning at this stage saves effort later.
Step 8: Polish and Seal the Surface
After the grout dries, clean and polish the tiles. A marble sealer protects against moisture and stains. Regular sealing is essential to maintain the durability of the floor. Moreover, do not use strong cleaners that damage the surface.
Well-maintained marble flooring stays beautiful for years. Sealing stops water damage and keeps the surface smooth. Reapply sealant every few months for long-lasting protection.
Step 9: Perform Final Inspection
Check for imperfections and marks. Fix issues before you start using the floor. Wipe the surface with a soft cloth to remove dust. Ensure all tiles are perfectly placed. A final check is important to ensure professional results.
Look for loose tiles before placing furniture. Fix problems now to stop bigger issues later. If gaps remain, reapply the grout. The final step ensures a high-quality installation that lasts.
Conclusion
In conclusion, with a little effort and proper tools, you can install marble floor tiles in Singapore. Following the above-mentioned steps, you can ensure a long-lasting floor. Proper planning and careful cutting keep marble floors in excellent condition.
A well-installed marble floor enhances the ambiance of the space. With patience and attention to detail, anyone can achieve a flawless marble floor that stays elegant for years.