
Install solar window films and enjoy a reduced indoor temperature in your Singaporean house. Solar window film is a great way to reduce heat and glare while protecting interiors from harmful UV rays. Many homes and offices in Singapore use solar window films to keep rooms cooler and lower energy bills.
They also help improve privacy without blocking natural light. Installing solar window film may seem difficult, but it is a simple process if done correctly. With the right tools and steps, anyone can install window film at home. This guide explains how to install solar window film easily and effectively.
How to Install Solar Window Films?
Installing a solar window film is easier than one might think it to be. The level of ease in solar window film installation is such that anyone at home can install it. To ease it further, PS Home Maintenance Singapore has provided a step-by-step guide for DIY enthusiasts.
However, if you still feel installing solar window film in Singapore is challenging, you can avail of their professional window handle replacement, door repair, and window repair services in Singapore.
Tools You Need
Before starting, gather the necessary tools. Here is a list of the necessary tools.
- A measuring tape
- A utility knife
- A spray bottle filled with soapy water
- A squeegee removes air bubbles
- A microfiber cloth helps clean the window before installation.
Step 1: Clean the Window
A clean surface is essential for proper adhesion. Dirt or dust can cause bubbles and affect the film’s performance. Use a microfiber cloth to wipe the window. A mixture of mild soap and water works well for cleaning. Avoid using harsh chemicals, as they may leave residue. When you clean it, dry the window with a clean cloth. Make sure no dust particles remain before applying the film.
Step 2: Measure and Cut the Film
Use a measuring tape to check the exact size of the window. Cut the film slightly larger than the measured size. This extra margin helps make adjustments during solar window installation. A utility knife is used to cut precisely. When you cut, place the film near the window to check if it covers the entire area properly.
Step 3: Apply Soapy Water to the Window
Fill a spray bottle with soapy water and spray generously on the window. This step prevents the film from sticking immediately. Therefore, it allows time for adjustments. The water also helps remove air bubbles during installation. To make it easier to position the film, you should ensure the window is fully covered with the solution.
Step 4: Remove the Backing from the Film
Peel off the protective backing from the solar film. Do it carefully to prevent it from sticking to itself. If you are working alone, use two small pieces of tape on both sides of the corner to help separate the film from the backing easily. When you are done with removing the backing, avoid touching the adhesive side to prevent fingerprints from sticking.
Step 5: Place the Film on the Window
Carefully position the adhesive side of the film on the wet glass. Start from the top and slowly press it down for proper alignment. If the film does not sit correctly, lift and reposition it while the glass is still wet. Gently press the film against the window to ensure a perfect attachment before smoothing it out.
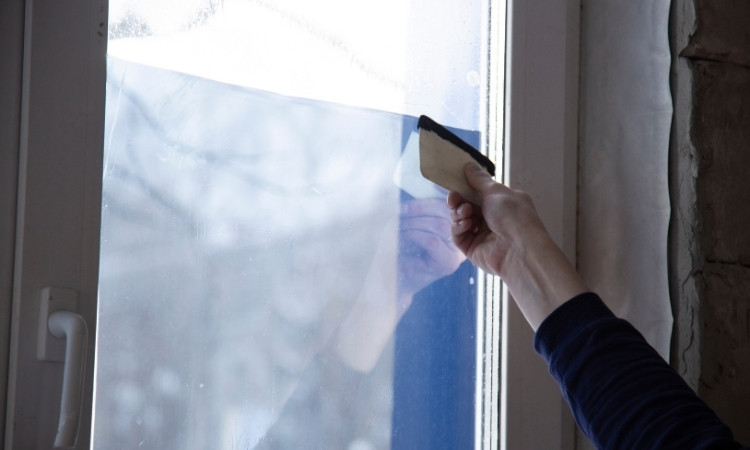
Step 6: Remove Air Bubbles and Excess Water
Use a squeegee to push out air bubbles and extra water trapped under the film. Start from the center and move towards the edges. Apply even pressure to prevent wrinkles and ensure a smooth finish. If bubbles remain, spray a little more soapy water on the surface and use the squeegee again to remove them.

Step 7: Trim the Edges
After the film is smooth, use a utility knife to trim any excess film along the window edges. Holding the knife at a slight angle and cutting along the frame ensures a neat finish. Once trimmed, press the edges firmly with a squeegee to ensure perfect adhesion. This is all that you require to install solar window films.
Step 8: Allow the Film to Dry
The film needs time to set. Avoid touching or cleaning the window for at least 24 hours. Drying time may vary depending on the humidity in Singapore. A cloudy or rainy day may take longer, while a sunny day speeds up the process.
Conclusion
In conclusion, it is an easy and cost-effective way to improve comfort in homes and offices in Singapore. It reduces heat, blocks harmful UV rays, and adds privacy. The process involves cleaning the window, cutting the film, applying soapy water, positioning the film, removing bubbles, trimming the edges, and allowing it to dry.